Step by step guide on how to create newsletter with SquizMAIL

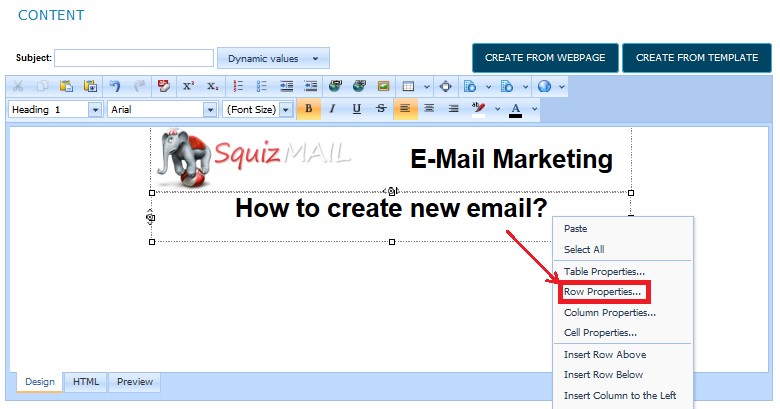
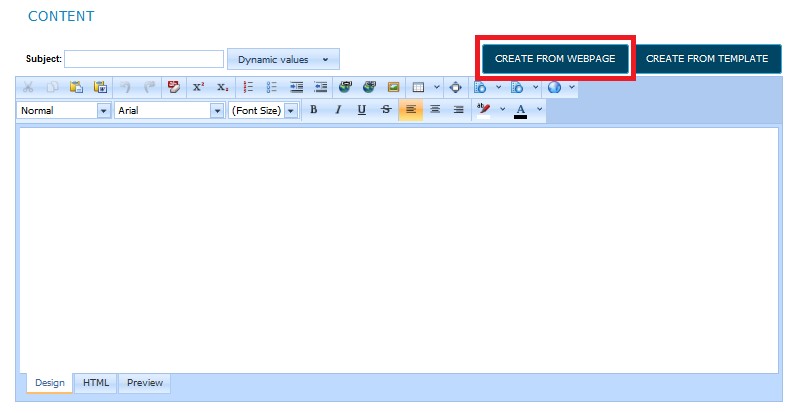
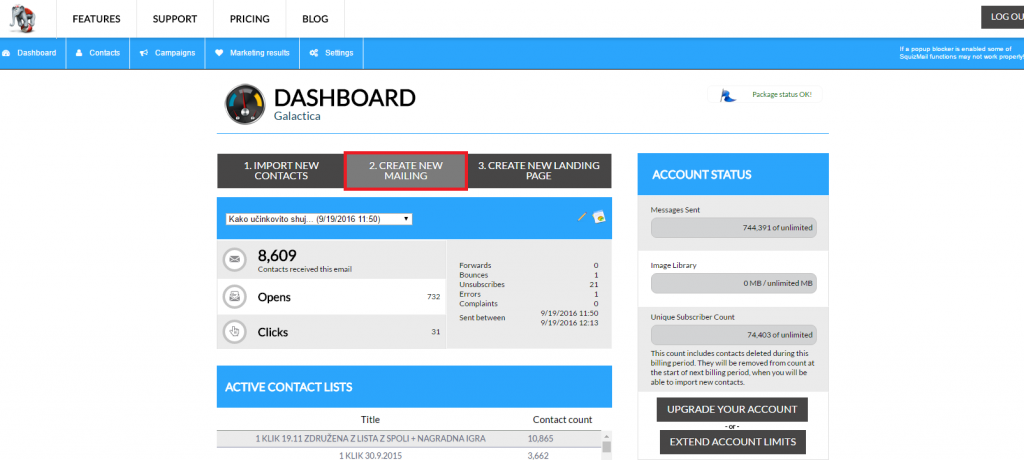
To create new email click »NEW MAILING« on the main Squizmail page.

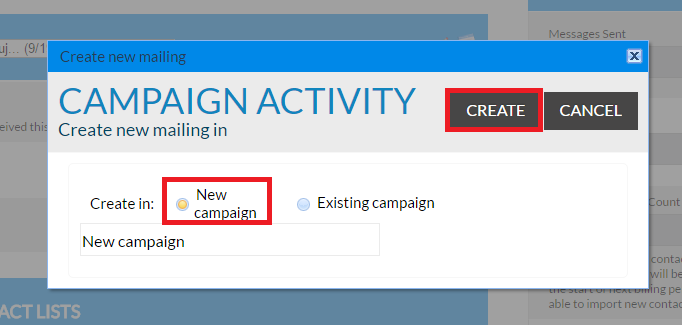
You can create a new campaign or use the existing one. For a new campaign, click the button “New campaign”, insert a name for the campaign and click “CREATE”.
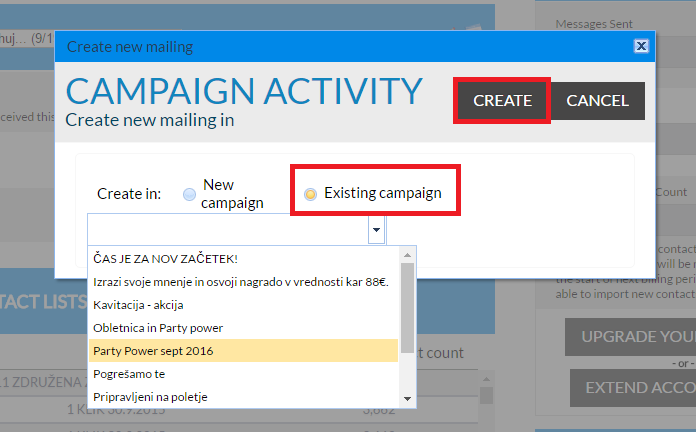
If you want to use the existing campaign, click “Existing campaign”, choose a campaign and click “CREATE”.

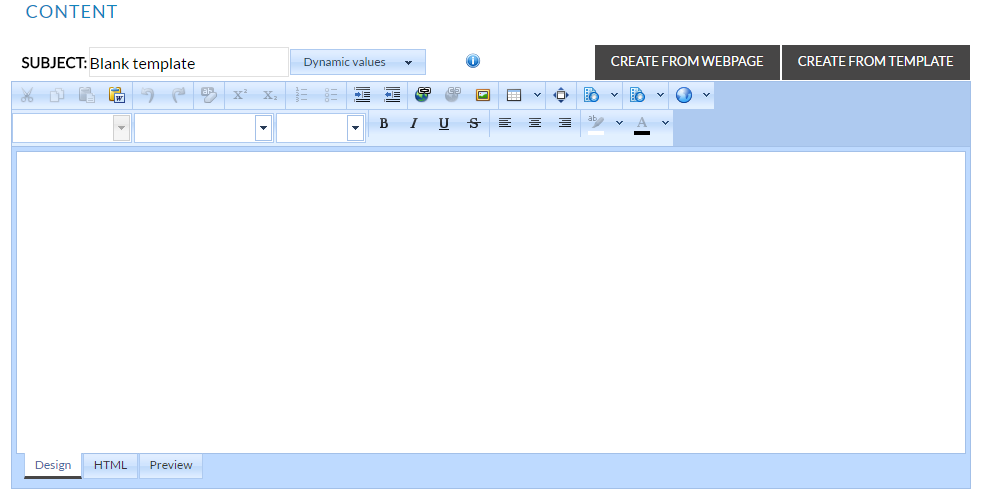
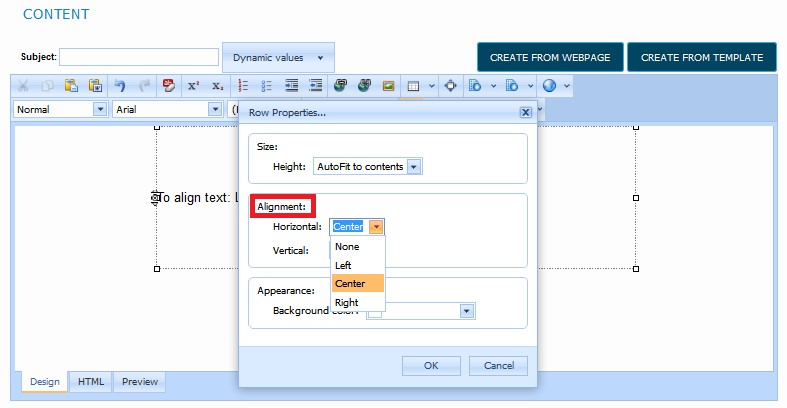
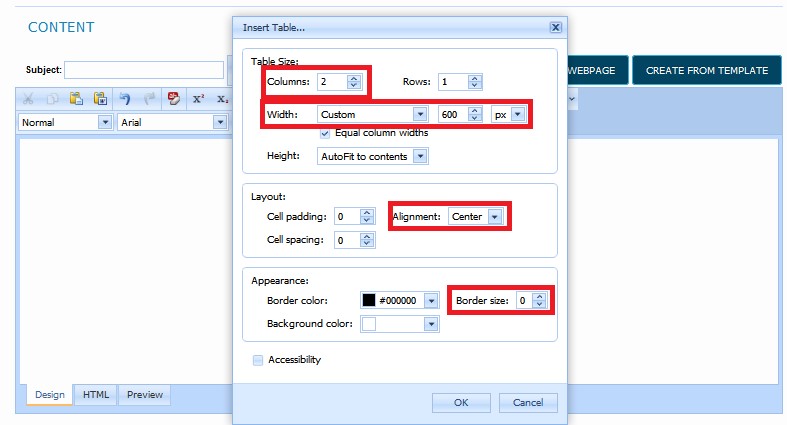
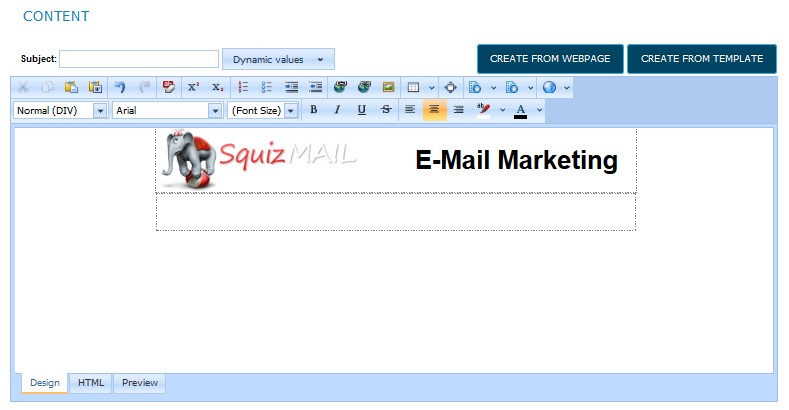
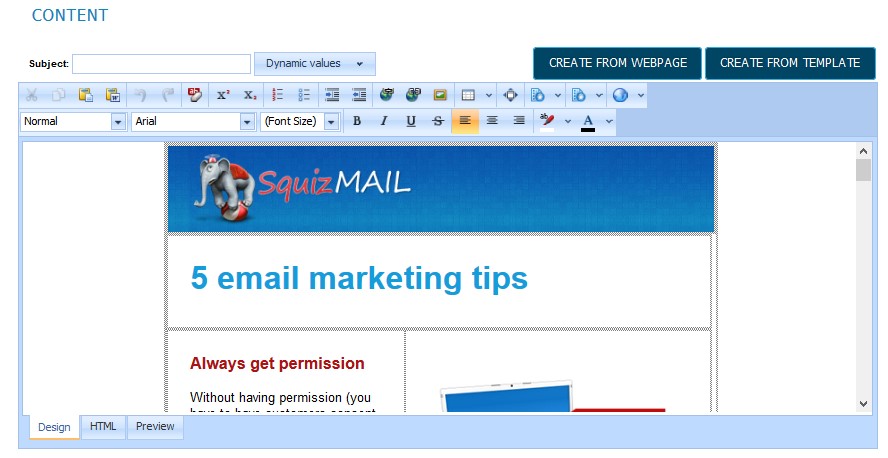
After previus step, you are redirected to templates page. Simply click on template you like and system will automatically insert it to the editor.

For creating an email from scratch there is an online html editor with text editing functions, a table creator, and an image uploader/inserter available in Squizmail.


Editor functions


Basic text editing functions
Basic functions for text editing, similar to other text editors are highlighted in the picture. You can select different font styles and positions of your text.

You can choose between “Bold”, “Portrait” or “Underlined” style and different colors of the text.

With the option “Text Highlight color” you can change the color of the background of your text.


Insert hyperlink


Select the part of the text in your message you want to add a hyperlink to.

Select one of the three options:

  • Insert URL address
  • Insert Email address
  • Insert a landing page, previously crated in Squizmail

Email address

Insert the desired email address to which the user will be redirected when clicking the link.


Insert Picture/Edit


To insert a picture, click on the highlighted icon. If you want to edit the picture properties, first click on the picture then on the icon.

You can insert a picture from the web (URL address), or you can upload it from your local computer.

Insert a picture from a URL address

In the field “Enter image web address” insert the URL address of the picture and click “Insert”.

Insert a picture from the local computer

Choose the picture in your local computer and press “Insert”.


Working with tables to create the right alignment in emails

To create an email marketing campaign you will need to know how to insert/create and edit tables.
Press on the icon selected in the picture and select “Insert table”.

Insert the number of columns, the number of rows, the width of the table (600px recommended), the cell padding (space between cells), the alignment of the table and border size.

You can edit the height of table with a mouse click – click on the border of the table and move your mouse up or down.

Center align elemnts within a table
Right click on the table row and select row properties.

You can align the text to the left, to the right or the center of the table.

You can align the text to the left, to the right or the center of the table.

Inserting two colums into one row
When you would like a picture and a text in one row, two columns are the best option.
First you insert a new table.

Then you choose the option of 2 columns and other desired settings (if you don’t know what to choose, you can insert the same settings we have in our manual).

Insert a picture into a table
To insert a picture into a table, first click the desired table cell and click “Insert picture icon”. You can insert picture from the URL or you can upload it from your computer.

You have now inserted the picture on the left side of the table. Now you can write and edit the text graphics on the right side.

Add a new row/a sub table to the existing table
To add a new row to the existing table, first click on the existing table and then click on the insert table icon in the toolbar. Enter table properties and click ok.

In this case, we inserted one row.

Adding background to a table cell
To create the background for the cell, right click the cell and select “Row properties”.

Select the desired color for the letters and the background and press ok.

Congratulations – now you know how to create a new email from a blank page. Just simply add rows and columns and insert text and pictures until you are satisfied with the look of your email.

HTML Preview
You can also create and edit an email in HTML. To do so, click on the “HTML” button and your email preview will change into HTML codes.

Preview button
Preview button will show you how your email looks like without table lines – that’s the look of your email visible to your recipients.

You can easily create email from website. To do so click “CREATE FROM WEBPAGE” button.

Insert the URL address of the webpage that you would like to load content from and click “LOAD”.

The webpage will be uploaded as a template of your email.

You can edit, add or delete text and pictures, insert or remove links, choose between different background colors, etc. Just follow the same instructions as they are under “Creating email from blank page”.

When your email is finished, enter the details:

* A/B testing is testing 2 different emails with the same content– you can test both versions (for more information about that function please see manual for A/B testing).

After all information is inserted you are ready to send your first email – to do so, click the “PUBLISH” button.

You can choose the date and time of when you would like to send your email.
Click “PUBLISH” again.

When emails are being sent the status is orange (Example: Sending 0 of 727 finished ….. Sending 296 of 727 finished ….. Sending 695 of 727 finished …..). You can see the new status if you refresh the web page with the F5 button.

When the sending is finished, the status will be green and you will also receive an email that the email sending is completed.

To analyze email campaign results click on the “ANALYZE” button.

Now you can choose between different analyze results that we offer, to check how successful your campaign was, who open your email, who clicked on the link from your email, from which countries/cities the receivers, who opened your email are from and what interested them in your email message.